Drawing a rose might seem complicated because of all the overlapping petals, but it's actually quite simple when you break it down into easy steps. This guide will show you how to draw a rose easy using a step-by-step method that anyone can follow.
What You Will Need
- A piece of paper
- A pencil
- An eraser
- A black pen for outlining (optional)
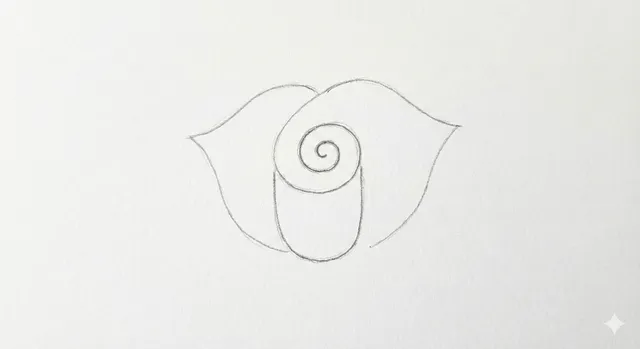
Step 1: Start with the Center
Draw a small spiral in the center of your page. This will be the tight inner petals of the rose.
Step 2: Add the First Petals
Draw a "U" shape underneath the spiral to close it off. Then, draw curved lines branching out from the top of the spiral to create the first layer of petals.
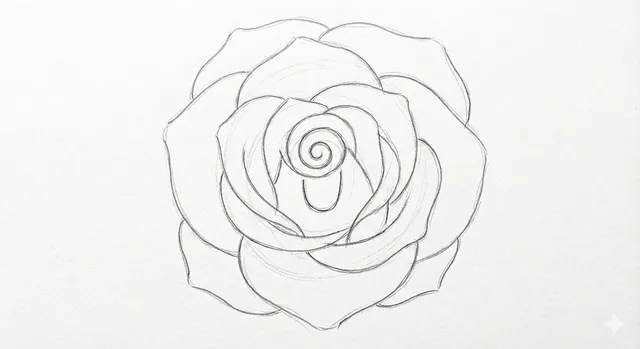
Step 3: Expand the Bloom
Continue adding curved lines around the center. Make them slightly irregular—nature isn't perfect! Overlap the lines to show how petals wrap around each other. This is the key to how to draw a rose step by step that looks natural.
Step 4: Add Outer Petals
Draw larger, wider curves for the outer petals. These should look like they are opening up. You can make the edges slightly wavy to give them a soft texture.
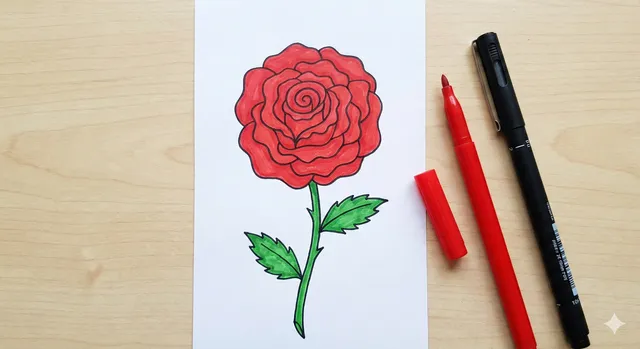
Step 5: Draw the Stem and Leaves
Draw two parallel vertical lines extending from the bottom of the flower for the stem. Add a couple of leaves with jagged edges on the sides.
Step 6: Color Your Rose
You successfully learned how to draw a simple rose! Now, grab your red crayons or markers and bring it to life.
Tip: Keep your pencil lines light until you are happy with the shape, then trace over them with a pen for a clean look.